That's it. Have fun.

After installing XFreeRDP2 you can access your "diskless" Raspberry Pi using Windows Remote Desktop.
If you don't see any fonts on your desktop, please make sure you have enabled the -i32 option in exports.
Further hints:
If you want to clone/save/copy on Windows the whole Raspberry Pi OS directory tree without losing unix attributes you can do it with "robocopy". e.g.
robocopy /r:0 /mir /it /dcopy:t /sl raspios raspios2
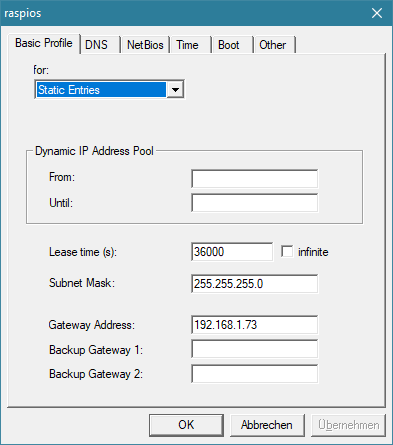
If you want to manage more than one configuration without changing TFTP configuration
- create a folder c:\server\boot
- in Preferences-TFTP set the TFTP Root Directory to:
c:\server\boot
and select the option "Use profile specific root directory if one exists"
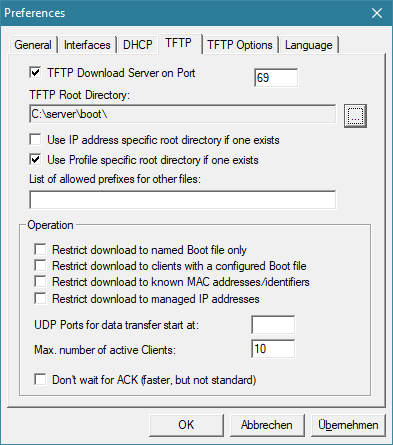
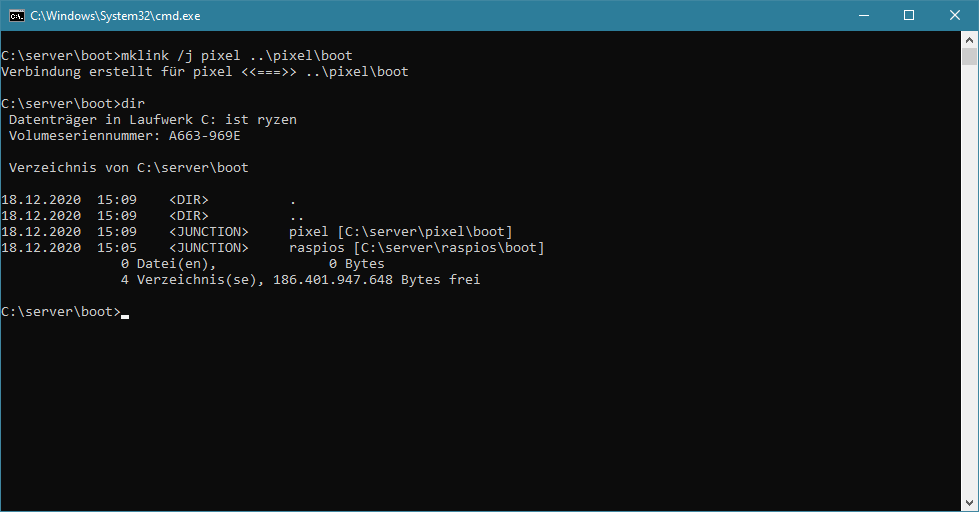
- in folder c:\server\boot create a symbolic link
mklink /d raspios ..\raspios\boot
For a new configuration
- add a link to subfolder boot of the new configuration
- add a DHCP server profile for the new client
- copy the whole OS
robocopy /r:0 /mir /it /dcopy:t /sl raspios <your-profile-name>
- edit c:\server\<your-profile-name>\boot\cmdline.txt to point nfsroot to the new folder